We like to call our engineers at DIS-TRAN Steel “myth busters.” Their day is spent crunching numbers and designing steel structures based off of standards, customer specifications and experience. Although they rarely get the opportunity to see their designs performing in the field, they love seeing their “babies” put to the test.
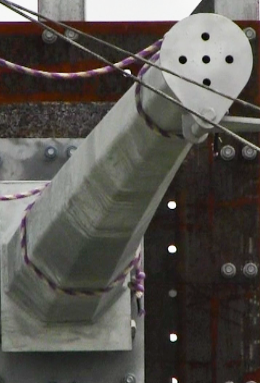
In a continuous effort by our Research and Development team, we recently conducted a full scale testing for transmission davit arms. Not only did we gain insight to how our arms performed, but we were also able to boost our confidence (and some bragging rights).
 It’s always good to have empirical knowledge through testing and research to confirm assumptions and know where improvements can be made, eliminating surprises in the field.
When testing, you want to make sure that your samples are a good representation for what will be in the field. Below we’ve listed out four things to keep in mind when testing transmission arms:
1. Make sure you have a good overall sampling- especially if you’re testing for a particular project where there can be different types of arms. For example, you might want to test a conductor or static arm, or if there are several tangents and deadends, you could test one of each.
2. As a fabricator, you don’t want to notify the shop that these particular arms are being tested. You want to be able to just pull an arm off of the shop floor that properly represents a typical arm that would be supplied on a project. Don’t do anything special to it that wouldn’t be done on a typical job.
3. Make sure a representative from the fabricator is there to ensure that the arm is bolted to the testing apparatus properly and that’s its being installed similar to how it would be in the field. You want to make sure that everything from fabrication to how it’s loaded and installed is as close as possible to how it is in the field so that you get true test results.
4. Make sure the loads that are applied correctly represent design conditions of the field. You want to get it as close as possible to what is really going to be in the field.
After everything is loaded and taken down, it’s very important that there is a thorough inspection to look for any damages, like cracks or permanent deformation.
While the purpose is to test the whole unit together, you can also break it down even further to see how other components, like hardware or connections, behaved under loadings. This provides proof and validity to your design standards.
Key things to remember: gain as much knowledge from the tests; have a true representation of what will be in the field in order to get true, honest results and make sure the arms can take the ultimate loads they were designed for.
The main goal with all the four steps listed above is to truly represent what is going to be in the field. You don’t want to assume anything, nor do you want to cheat. If you specially prepare the arm for testing, ultimately you’re cheating yourself and the end user. You want to know what to truly expect so that if anything pops up, you can make corrections for future designs.
